

You will need:

1 mini tin bucket (mine came in a pack of 3 from the cheap shop. It measures 5cm in height and 6 cm across the top)
Piece of patchwork fabric approx 25cm square
Needle and strong thread
A large handful of Polyfill stuffing
10cm Ribbon
15cm Ric Rac/trim
Hot glue gun
marker
scissors
Method:

On the reverse side of the patchwork fabric, draw a circle approx 18.5cm in diameter with a marker (I used a small cake plate to trace around).

Cut the fabric along the line.
Thread your needle with a long double thread and knot the end.

With the wrong side facing, fold the edge towards you and stitch a running stitch around, leaving the thread tail hanging.

Work your way around until you come back to the beginning (just like making a large yo-yo).

Gather the threads by pulling one end to create a ball.

Stuff until firm.

Knot the threads to secure, and trim excess thread.
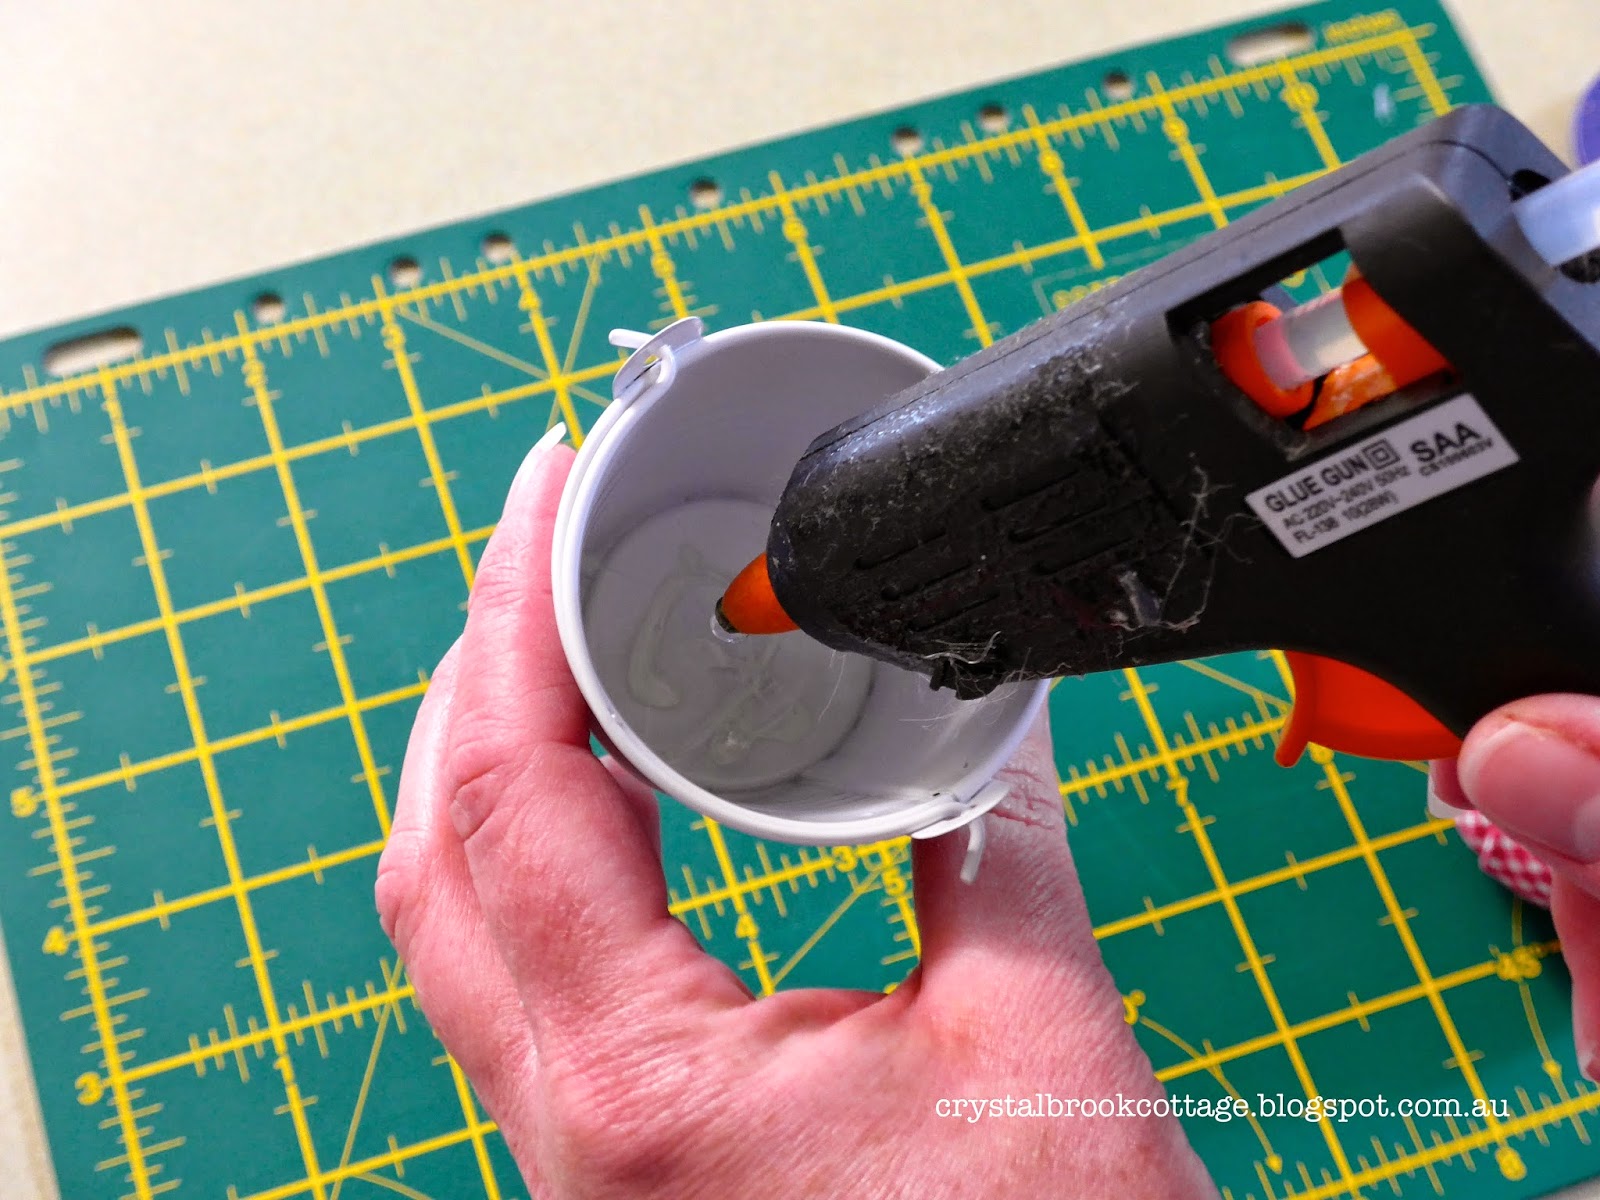
With the hot glue gun, apply some glue to the bottom and inside of the bucket, keeping away from the rim.

Place the stuffed fabric ball inside with the gathered end in first. This is the pincushion made, now for the decorating.

Apply a small dots of hot glue to the bottom edge of the outside of the bucket, affix trim.

Tie on the ribbon to the handle and trim ends.

Place some pins in the top and... ta da! Easy peasy!
You can also try using this method to make pincushions out of old china teacups, little ramekins, eggcups, silicone patty cases or even recycle an old tuna tin! The possibilities are endless! I'd love to see what you come up with :)
Well done. A great tutorial!
ReplyDeleteThanks Karen :)
DeleteToo cute!
ReplyDeleteThanks :)
DeleteSuper cute! I love the tape measure ribbon. Nice touch!
ReplyDeleteThanks Joanna, I adore tape measure ribbon, buy metres of the stuff when I find it so you will probably see it featured in future projects too :)
DeleteOh, so cute!
ReplyDeleteThanks Jeni :)
DeleteThis is sew cute! I love how you added alternate ideas for the base of the pin cushion. I think the old tea cups would look great, too! Thanks so much for sharing the tutorial. I am inspired!
ReplyDeleteThanks Lorna :)
ReplyDeleteJust a quick email to let you know that your project has been added to FaveQuilts.com.
ReplyDeleteYou can view it on our site here: http://FaveQuilts.com/Organizing/Bucket-of-Pins-Cushion.
We can't wait to share it with our readers.
Please help us share it online. Thank you for working with us.
Editors at FaveQuilts.com